
I have collected up a few fat quarters of fabric over the years and I decided recently that I was finally brave enough to actually use them for something (rather than the more natural policy of saving them for looking at, petting and just in case of a first aid style emergency requiring rolls of strawberry bandaging).
My DPNs have for several years now lived in the upturned lid of the little wicker box which is supposed to contain my 'lounge' knitting (yes, you and I both know how much of the knitting in the lounge actually fits into the box!). The problem is that as the number and sizes of DPNs and circulars get added to the mix, the more difficult it is to find a complete set of anything in even vaguely the right size. Something had to be done.
My straight needles live (along with some of H's paintbrushes and a green and white whirlygig) in a blue and cream jug on the bookcase and along side them are the two Cath Kidston needlecases that A has given me for Christmas and birthdays. On closer examination they appeared to be nothing more than a strip of fabric with a pocket at the bottom and a flap at the top to keep the needles in. So with more enthusiasm than plan and more courage than anything else useful I sallied forth. And here is the result:
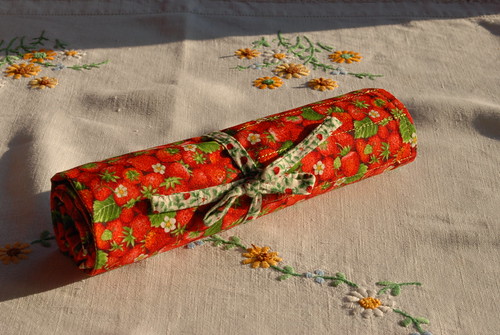
A little bundle of Strawberry goodness, which when you open it out reveals:
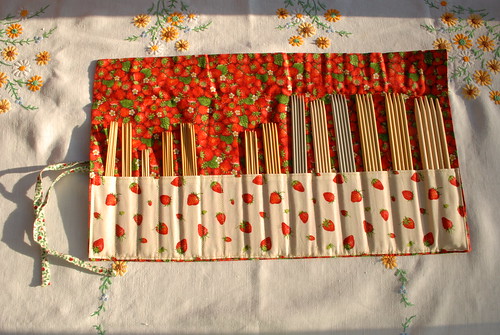
All of the DPNs that I could find and some spaces for the ones that are in socks of that I know to exist but cannot currently locate (2.75mms I'm talking to you).
It's neat, it's tidy, I can find them all, and I got to bin all the empty wrappers and cardboard sleeves that cascade from my knitting like confetti every time I search out a different sized set of needles - yippee.
I did at one stage intend to take photos of the construction process but I got so wrapped up in the sewing (and the cricket) that I completely forgot to take any photos whatsoever - so you'll just have to trust me for this one.
There are probably a million better tutorials on how to do this on the web but if your brain works in the same way as my brain writes, and you have impressive powers of visualisation, you might like it.
I took one fat quarter and folded it in half and seamed it around almost all of the three sides with right sides facing. Then I turned it inside out through the hole and sewed up the final gap to give a completely reversible piece of fabric. Depending on your size of DPNs and fabric you can fold the fat quarter either way - but try to aim for a finished piece that is at least 10 inches tall, the width is largely irrelevant. I folded my fat quarter short sides together, and even then had more than enough space for all the DPNs.
From a contrasting fat quarter I cut a strip a little longer than my double-sided piece and five inches deep. I sewed a turned hem on one long edge (turn under and sew, turn under and sew again) and then ironed a quarter inch fold around the rest of the strip, clipping the corners to make them turn neatly.
Then I pinned the pocket fabric to the backing fabric, cut off any excess and folded, ironed and pinned the other short side to fit the backing fabric. Once I'd sewn around all three sides I had one giant pocket.
To make the individual pockets I collected up the DPNs and did a bit of measuring. For anything up to 3.5mm, a 2.5cm pocket worked well, then I added a few at 3cm, a couple at 3.5, one at 4cm and one at 5cm. If you measure between the two seam lines at the edges of your giant pocket you'll know how much you have to play with - just fiddle with the maths until you have something that suits your DPN collection and the width of your giant pocket.
Then mark up each of your seam lines with a pencil or a water soluble marker, or whatever suits you best. I would suggest starting from the wide end because it's much easier to squeeze 2mm DPNs into a pocket that's a smidge too small than 7mm so it gives you a bit more flexibility for human error!
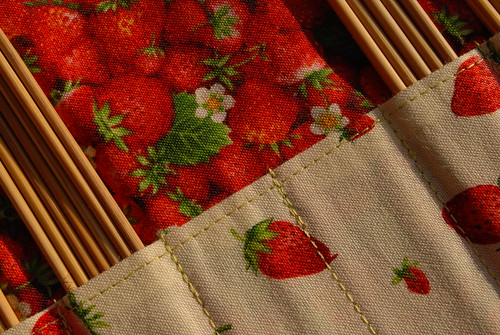
Sew each of the pocket seams along the lines you have just drawn - I started each seam a little way down from the top of the pocket, reverse stitched up to the edge and then sewed all the way to the bottom before reverse stitching again to finish off. You can see the start of the pockets here:
To make the flap, simply pop your longest DPNs in their relevant pockets and work out how much fabric you have left over to play with. Then mark a line all the way across the holder at that point (mine is about 2.5 inches from the top) and sew a seam straight across to help the fold.
The final touch is the tie (more strawberry fabric I know). I cut an inch strip from a fat quarter, sewed it right sides together and turned it right side out to finish off sewing up each end. The middle of the tie is attached to the left hand side because on my holder that houses the smaller DPNs and they're the ones I use most frequently.
As the Meercats say - "Simples!"
Seriously, this can't have taken me more than an hour or so with the sewing machine and it is so much better than the previous arrangement and it's all strawberry - and I may have mentioned a slight enchantment with all things red berry.
It's very strawberry indeed, I made a needle roll with the idea of being organised. The dpns still live in a vase on the shelf behind my head so it was a total failure for me.
ReplyDeleteYou can make bags from fat quarters..
Its lovely.
ReplyDeleteLoving this! I love seeing needles all packaged up like this in a cute roll! Odd as that may seem.
ReplyDelete